Get out of Auto mode!

This is photography’s silly season when everyone is out snapping photos wildly in anticipation of the perfect Holiday card shot.  Have you been out shooting some family fall pictures over the weekend?  Does this scenario sound familiar?

You take a million pictures (ok seriously several hundred) only to find 1 or 2 really good ones.

You sit back,  look at your computer and think “Now how did I do that again?”

You have no idea.

You just switched the camera to Auto and hoped for the best.

Sometimes you get lucky!

But the next time you have to repeat that shot, you have to go through the same process of shooting several hundred images to get that one winner.

…Still stuck in Auto Mode….

Wouldn’t it be nice to know what all those camera buttons mean so that you could just take a look at your subject, your lighting and knowing what effect you want to achieve, just make it happen?

Because you know how to use that camera.

You know all the secrets and tips of getting that great shot.

You know how to handle different lighting scenarios, what those buttons do and when things aren’t looking good you know what to do to make it right.

Well I have news for you!

As part of my mission to get everyone out of Auto mode, my “Master your DSLR  – Photography 101” is now on sale for half price.  Yes–I’ve dropped the price to only $99 for the remainder of 2011 so you can have a chance to get in before the holiday season to really learn how to use your camera like a Pro.

Use the time between now and the end of the year to get a great introduction to photography and using your camera to the max all in the comfort of home, on your schedule and at your own pace.

You can check out the full course content here.

Once you register you have full access to the full 5  week’s material so you can digest it slowly or all in one go!  And you’ll continue to have access for 3 months so even you plan to get a new camera over the holidays take advantage of the discounted price now because enrollment into the course at this price will end on December 31st 2011.

Don’t just use your DSLR camera like a big ol’ Point and Shoot– Get out of Auto Mode and check out “Master your DSLR – Photography 101” now!


Happy Snapping


P.S. The holidays season will have lots of great photo opportunities.  Don’t waste them! Learn how to use that DSLR now.


A new way to carry your camera

Glide Strap

Glide Strap

This morning has been transformational!  Yes – my photography experience has been changed forever.  Why you ask?  Well of course, I love my camera. I love taking pictures of my kids on the go – at the park, running around, playing outside, but I HATE my itchy, scratchy, not-fun-to-wear camera strap.  My DSLR is heavy and having it swinging from my neck is just one more thing that makes me feel more like a mule than a mom ( diaper bag, camera bag, purse, toddler, oh yeah and infant in the Ergo.)

Well today I finally opened up a package sent to me by the innovative team at Custom SLR.  These guys make AWESOME stuff to pimp out your camera.  They had sent me a C-loop and a Glide Strap to do try out and review.  Now I know you can get really nice cushy camera straps and camera strap covers that help with the itchy scratchy stuff but the Glide Strap from does so much more than just look cool.  It’s ergonomically designed so that the weight of the camera is evenly distributed over your shoulders and the camera feels like a feather.  It also has a super innovate design so that your camera simply slides up and down the strap – hence the “Glide.”  It sounds strange but trust me – it’s genius. As I was assembling the strap out of the box I was thinking – em…  I don’t see how this is going to work but when I put it on it was a total ah ha moment!  Why didn’t I think of that!

Split Strap

Split Strap

But wait – there’s more!   The best thing about the kit that I received was the C-loop.  This is totally innocent looking little piece of equipment is the key to the ease of use of the strap and what’s revolutionized my photography experience!  If you’ve ever traveled with your camera you are faced with a big dilemma.  For example, when myself and my hubby went to Florence we were really nervous about having the camera on full view around our necks.  It’s so cumbersome and obvious that we’re tourists and I was already trying to watch my pockets and my backpack.  If I put the camera in the camera bag, trying to access it at a moments notice on a busy hot street was not easy. I ended up  carrying it bandeau style which was good but still difficult to access in order to quickly to snap a shot.  Another problem I had was that the lens kept bumping into people as I walked.

C loop

C-Loop

Now the C-Loop changes all of that.  As you can see from the pictures below it simple attaches your camera strap to your camera by screwing into the tripod thread at the bottom of your camera body.  This allows the camera to freely rotate and hangs directly down so no bumping off walls or tourists!  Like I said – such a simple idea which works brilliantly.

So I am transformed.  Some days it’s easy to take pictures and somedays it’s hard.  Make it easier on yourself by getting your gear on and check out the difference that a new way of carrying your camera might make to your photography over at Custom SLR.  I’m off out to get some more shots of these kiddos running around on this glorious Fall day.  Then I might chat to the hubby about a repeat trip to Italy to get all those shots we missed before 😉

Happy Snapping

Ingrid

P.S. Check out other reviews of the Creative SLRs’ Glide Strap and C-loop on Amazon

10 Tips for Great Fall Photos

Fall Colors
There is very little that you can do wrong when faced with the wonderful beauty of the red, amber and golden foliage that fall bestows on us for a few weeks  this time of year.   Sometimes however, our pictures fail to live up to the beauty we saw in reality. Here are 10 tips to make sure what you see is what you get.


1. Shoot during the golden hours.

You’ve probably heard me talk about the Golden Hours before. This is the first hour after sunrise in the morning and the last hour of daylight in the evening when the light is at it’s richest. This will in turn give you the best light for shooting. It’s definitely worth your while to get up that little bit earlier just to see the impact that the light will have on your image.

2. Shoot after the rain.

This is another time when the air is at it’s clearest and hence the light has a great quality to it. It can also be really interesting to see how the we leaves reflect and play with the light.

3. Don’t forget about general composition rules .

This is the biggest mistake people make when shooting Fall Colors. They get so overwhelmed by the beauty surrounding them they forget things like using the Rule of Thirds, having a definite focal point and using lines to draw the viewer’s eye into the picture.

4. Don’t clutter your image with unnecessary stuff.

Keep it simple perhaps by concentrating on a few leaves or interesting trees.

5. Vary your angle

Look up into the trees and don’t forget the leaves on the ground.

6. Make use of contrasting colors.

Red berries contrasting with green leaves, orange leaves backdropped against a blue sky

7. If your sky is not a vibrant blue, then just omit it from your pictures.

Best to leave it out rather than have a dull washed out gray sky.

8. If your shooting with a DSLR,use a polarizer.

This will really help to saturate your colors.

9. Don’t forget to play around a little in Post Production.

Every image can benefit from a little tweaking in your photo editing software.

10. Have fun

and get out there before the display is gone again till next year

Got any more tips?

Please share them in the comments below.

Happy Snapping


5 Tips to Make the Camera Love You.

The very photogenic Agne

I got a great question this week on the Facebook page from Tracy. She wanted to know if I had any tips for making a person more photogenic?

Instead of trying to put together my answer in a Facebook Post I thought I’d answer it here on the blog so we all call learn how to look pretty.  These tips are great if you are getting headshots done for your profile, at an event or anytime a camera is pointed in your direction.

1.Relax.  

The first thing that you have to do is to try to relax.  If your not relaxed then you are going to look uncomfortable and awkward and ultimately you’ll be unhappy with your photo.  I realize that this is easier said than done but it does get easier with practice so the more opportunities you get to get your photo taken  – do it!   This might mean hiring your kid to do a photoshoot with you in the back yard until you perfect your posing 🙂


2. Make Up.

Don’t underestimate the power of a little blush and a little lipstick.  The camera tends to show up more of our flaws so do your best to cover them up before getting in front of the camera.  A tad more make up than you’re usually comfortable with is probably the right amount.   A little retouching afterwards can help too but it’s always better to look great from the get go.  This will help your confidence and hence help you to relax also.


3.Elevate

If possible, try to get the photographer to take your picture from a slightly elevated position looking down on you.  Grab a step ladder or a stool and get the photographer to shoot you from above as you look up into the camera.  This   is a very flattering angle for most people.  It helps to elongate the neck and get rid of any extra double chins and gives an overall feeling of “lift” to the image.


4. Angle.

Turn your body at an angle to the camera.  This is so much more flattering than standing straight on towards the camera –  mugshot style.


5. Smile!

I guarantee you you wll look better if you smile at the camera.  It doesn’t have to be a cheesy grin just try to smile with your eyes and look into the lens of the camera as if it is the eyes of the person you are talking to. The end result will be a much better connection between you, the camera and the viewer of the image.

So take a deep breath, relax and Bonus Tip Number 6. – Don’t say cheese say lollies:) !


Happy Snapping


P.S. Thinking of taking up a camera class this Fall?  Check out my Master your DSLR – Photography 101 and learn from the comfort of your own home.

Taking Better Food Photos

It’s hot in Georgia during August.  Too hot to be slaving over a hot stove and that’s for sure.  That’s one of the reasons why we’ve been firing up the grill so much over the last few weeks.  My hubby is a real “Grill Meister” and loves to cook out.  Suits me too as all I have to worry about are the veggies which lately have been mostly salad straight from the garden – I know, I know, I’m turning granola.

Anyways, as usual I have to incorporate photography into everyday actives and last night’s dinner provided me with a great opportunity to shoot for my new upcoming course Better Blog Photos.  So while Sam was slaving away over a hot grill I was setting up some great food shots.

We also seized the opportunity to try out some awesome chicken from Zaycon foods.  You can see from the pics this really was some of the freshest and tastiest chicken I’ve ever eaten.  And Yes… of course Sam’s grilling technique played a part of it too 🙂

Lighting

Like I’ve said many times before photography is all about good lighting and food photography is no different. One of the biggest mistakes for shooting food photography I see most people make is shooting with the flash on.  This results in flat images such as this:

Food Photography 1

Food is a still object and therefore it’s easier to capture without the use of flash so I suggest turning your flash off and just using whatever light you have available to you.  Remember that in order to be successful doing this you also need to hold your camera super steady or ideally use a tripod.

 Food Photography 2

Already the picture is looking more appetizing and it’s only veggies 🙂


White Balance

Now we see that the next issue that we have is that the color isn’t exactly right.

Food Photography 3

The lights that most people have in their kitchen, although bright  may give your photo an artificial color cast.  This can be corrected in your camera by adjusting the White Balance setting.

White Balance

Look for the WB icon in your camera menu and consult your manual to see what the different icons mean.  Change it until you get a more natural light effect.


Composition

Now that the settings are a little better I can think about composition a little more.

Rather than hovering above the food, lower your camera and take a closer shot from a lower angle.

Food Photography 5

Now I’m getting hungry!

Just by doing those 3 simple things –

1. turning off my flash

2. adjusting the White Balance setting

3. lowering my angle of view

I’ve improved my shot dramatically.  Give it a try for your next foodie pics.

If you’d like to try out  Zaycon food’s convenient food service,  save some bucks as well as experience great food like the chicken above, you can check out their site here to find out more information.  They have a pretty unique concept going on and it’s a great money saver.

If you’d like more detailed information on how to take better photos like this then watch out for my new course “Better Blog Photos” coming soon!


Happy Snapping

How Changing Aperture affects Depth of Field

Although I have many titles I am of course, a mommy first and foremost. The addition of my baby daughter in late April has mean’t that I have to be very creative in trying to make time to work, blog not to mention spending some fun time with my other little girl Sophie. So last Saturday I decided to roll these three things into one. We made these delish cupcakes and Sophie decorated them. She was very proud of her work, as you can see, spending 15 minutes decorating and 2 minutes devouring them!

Cupcake

Meanwhile I seized the opportunity to put together this mini tutorial for you on How Changing Aperture affects Depth of Field.

A lot of my students bemoan the fact that there is too much math involved in photography. And they are right – there is a lot of math!
If you get down to it, it’s all about math and physics but where would the fun be in learning about that? What about the creativity of manipulating light and dark? Evoking emotion in your viewer. Perfecting your art?

So let’s get visual and forget about the math for a minute.  What I want to demonstrate here is how I can alter the Depth of Field by Changing Aperture settings on my camera.

Depth of field refers to the zone of acceptable sharpness in a photo.

I took the following pictures of Sophie’s cute cupcakes in succession, everything(ISO and Shutter Speed) else been held constant, just changing the aperture of each shot.

Depth of Field


You can see how increasing your f number (aperture) REDUCES the size of the opening in the lens  and hence increases the depth of field – the amount of the “in focus portion” of the picture.

Your Turn!

Try this at home by lining up several similar objects – wine bottles, tomatoes, flowers, crayons – whatever you have easy access to.

  • In order to make this as easy as possible for you make sure your in a well lit place
  • Set your camera to Aperture Priority mode- Usually either A or Av on your Mode Dial.
  • Keep your focus point set to the same point each time. In the above pictures I kept focused on the orange cupcake.
  • Turn the mode dial wheel of your camera to adjust the aperture values.
  • Take a shot at every aperture value or f/stop that your lens will allow.
  • Pay attention to what happens to the shutter speed values as you change your aperture.
  • Upload to your computer and view the images side by side. This will be much easier than trying to use your camera LCD screen to view the images.

Can you see the difference between shooting wide open with a low f/stop and shooting with a narrow aperture and a high f stop?

There is a lot more to depth of field and aperture than just this including concepts such as “The circle of confusion” – Ha! but I think we’ll stop there for now.  If you get the above you’re doing good!

I’d love to see some of your shots so feel free to post them on the CameraShy Facebook Fan Page.

Happy Snapping!


Sometimes pictures need words

Sometimes I take photos to remember everyday stuff.  Like last night during dinner, I wanted to remember the name of the bottle of wine we were drinking so out with my iPhone and snap – an image that I’ll be better able to locate than a scrap of paper used to scribble down it’s name.

Of course I also take pictures to remember the momentous occasions – the birth of my new baby daughter for one – lots of pics 🙂

And sometimes, I take pictures to remember the little things that will in the future become the big things. But I really need to do more of this,  It hit me during this past week – several times. I’ve been gently reminded of the importance of picture taking as a way of preserving the past for the future.  We’ve been gathering up pictures for my MIL’s surprise birthday party.  These tiny square blurry images, from my husbands childhood tell such lovely stories.  By examining what’s in the backgrounds we get excited about a favorite toy that can be seen or the memories come flooding back about that particular birthday party.  These little squares with rounded off corners are windows into the past – Goodtimes and happy memories.

But a lot of the time we were left guessing.  Who is that? What ever happened to her? Was that you or your brother?   If only there was a little journaling to go with them, those pictures would have sound.  Back in the shop at home, we spend a great deal of time restoring and copying old photos.  These pictures are all people have left when loved ones pass and time moves on.  The really special ones are those with a little bit of handwriting on the back with the who, where, when and sometimes why – Great Aunt Bessie, Endenfell, Oct 1938  – Annual Boxing Day party.

I take so many photos compared to most people but I am so bad at cataloging them.  These days I feel proud of myself if I even get them printed never mind put into an album.   I am terrible about journaling and even when I have done so, I hardly ever record more than  just the facts  I’ve tried to scrapbook but always feel overwhelmed.  But, I’m resolved to change this.  I’m going to do it for my kids – even if if they don’t appreciate it for years to come they will, one day.  How I’m going to do it I’m not yet sure.  Maybe I’ll scrapbook.  Maybe I’ll do more photobooks.  Maybe I’ll make a blog.  Whatever way I do it, they won’t have to fill in the blanks.

It’s important.  Life  is short.  And I’ll record more than just the facts.  Just so they know the why…

How do you record your memories for the future? Are you a scrapbooker?  Let me know your thoughts in the comments below.

Ingrid

Catch ’em while you can…

Since becoming the mom of two gorgeous girls I’ve actually been finding myself taking less pictures instead of more.  Well less with my DSLR anyways and much less than I did of my eldest daughter Sophie. I suppose I had more time on my hands and could spend all day marveling at her little toes, her funny little faces and capturing her every squirm.  I probably took more photos of Sophie in her first week than have done of Mollie in her whole 7 weeks.  I guess that’s what comes with having to run around after a 2 1/2 yr old as well as a newborn.

I’ve heard of this before.  My mother in law (mom to 3 boys) has told me about her first-born’s beautiful baby book, full of pictures and journal entries.  She could tell you everything from  when he had his first smile to how many diapers he went through a day (well almost).  The middle child’s (my husband) book was a little less detailed with less pictures and the youngest’s is merely a shoebox of photos – one of him as an infant, the next his first day at Kindergarten 🙂

I’m not too worried though. Not having a digital camera by my side all the time hasn’t been a problem because I’ve found myself using something I didn’t have when I had Sophie – my iPhone.  Not only do I have facebook to keep me company at the 3am feed, I can listen to my Podcasts while she’s fussing and I have a camera at the ready to capture all those cute smiles and giggles that are just spontaneous.  Put that together with some of the cool  Apps out there and I think I haven’t done too bad.  What do you think?

This was done using Picnik in my web browser.  I’m loving it’s simplicity right now.

And of course I would have missed this in the car:

Cute eh? Sometimes you’re better not to be too contrived.  It doesn’t always matter about the technicalities – just BE in the moment and try to preserve the memory, in whatever way you can.

What spur of the moment pictures have you taken that have ended up being some of your favorites?  Please share them in the comments below.

Happy Snapping

I’m still here :)

Hi guys,

Just a quick note to let you all know that I haven’t dropped off the face of the earth but rather I’m busy taking lots of pictures of and enjoying my new baby girl!  She came a little earlier than expected and caught me a bit off guard – hence the lack of posts here.  Anyways, I promise to get back into the swing of regular posting very soon and I’ve lots of new and exciting plans for the summer and fall including more online classes.

If there’s anything in particular you’d like to learn about I’d love to hear it so comment below or feel free to email me directly ingrid[at]camerashy.info  Watch this space for course sign-up details very soon!

Happy Snapping!

Ingrid

Challenging Myself

sits springphotobadge Join the SITS Spring into Action Photo Challenge!Last week I heard about the SITS Photography challenge and decided to jump on board for a couple of reasons.

1. I love the SITS community and find it an incredible resource for a wide variety of information.

2. I really needed a bit of a kick to get my photography moving again.  Because it’s been difficult to move around these days due to my impending “big event” I’ve hardly been taking any pictures – a terrible shame.

3. I think because I spend so much time teaching others about photography I’ve forgotten how much fun it is to take direction from someone else and simply put myself in the shoes of the student.

So for the past week I’ve tried to put all of my “know-how” to one side and focused on following along with the SITS Spring into Action Photo challenge expertly led by Lynda Giddens.  Although I haven’t been able to blog about it daily I have been keeping up with the tips and most importantly, taking pictures every day!

Here’s what we covered on days 1 and 2.

Day 1 We were encouraged to consider Perspective and Composition.  We looked at changing our point of view, shooting down low, from above and from the side.  We were also told to think carefully about composing our shots thoughtfully using some of the “Rules” of photography such as the Rule of Thirds.

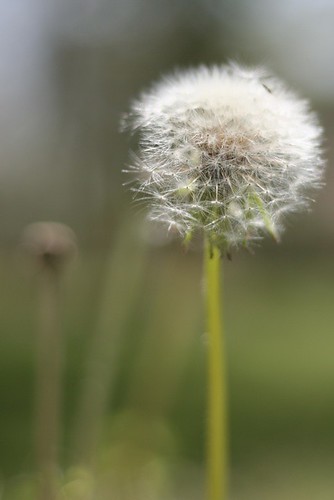
Instead of shooting the obvious (my DD) I decided to head outside and see what I could find and this is what I came up with.

Dandelion2

Day 2 was all about editing our pics using some of the free online photo editors out there.  I have to say that I really was impressed with the options that some of these offer and I’m working on a blog post that will review some of the most popular ones.

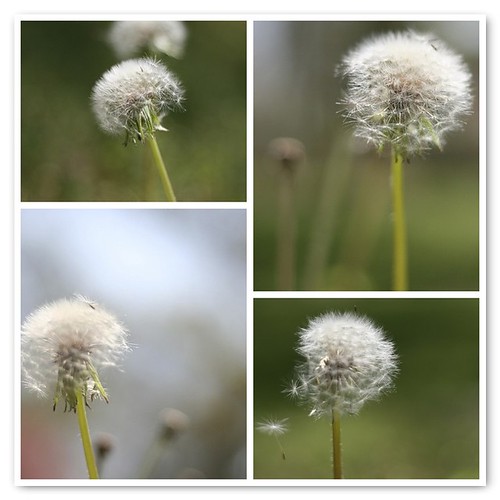
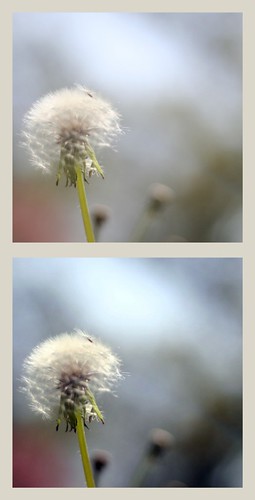
One of the coolest features online editors have is the ability to make photo collages in seconds – literally.  Here’s one I made of my dandelions.

SITS Day 2

Seriously if I were to do this in Photoshop I’d be at it for at least 20 mins and this took about 2!  For this one I used Big Huge Labs.

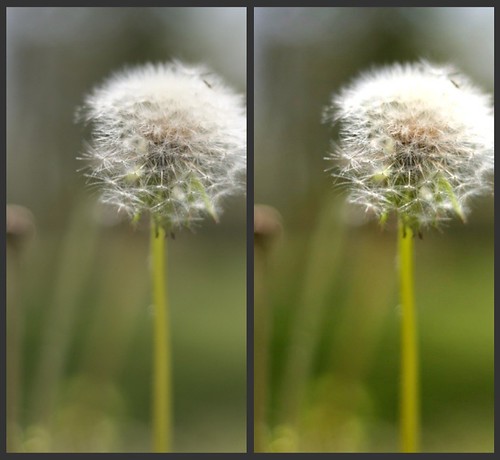
And finally I tried out Picnik.  I’ve used it several times before but it was nice to give myself a bit of time just to play around in there and see what I could come up with quickly.

Here are the results showing the before and after shots:

Dandelion Comparison

Picnik collage 2

Let me know what you think!  I’m off to catch up on Day 3 and 4!

Happy Snapping

1 9 10 11 12 13 15